Refine Edge Brush Tool
If you’ve ever attempted to remove background from an image with complex details like hair, you know how difficult it can be. Photoshop, a strong picture editing application, provides numerous strategies for accomplishing this task effortlessly. In this guide, we will show you how to remove background with hair while maintaining a professional and polished look.
Why removing background with hair is difficult?
Removing background from a photo becomes one of the more challenging tasks when it comes to intricate details like hair. That complexity is due to a number of factors such as:
First, hair has a fine and complex texture, with individual strands often overlapping and intertwined. Capturing this level of detail while separating the subject from the background requires meticulous precision.
Furthermore, hair comes in a multitude of textures, lengths, and colors. Each category presents its own set of difficulties. For example, fine hair may need extra attention to prevent it from blending into the background, while curly or frizzy hair needs to preserve the intricate twists that define the hair’s character.
Another important issue is the inherent translucency of the hair. Light passes through the fibers, creating variations in color and brightness. When the background is removed, this re-creation of natural light becomes necessary to maintain the realism of the subject as well as the photograph.
For the simplest and most concise understanding, you can imagine that hair is a combination of long and thin strands interwoven, to cut the details of the hair perfectly, takes a lot of difficulty and extremely high accuracy. Therefore, users need to use professional editors and have relatively difficult features to handle.
How to choose the right tool and function to remove background with hair
Choosing the right tool to remove background while preserving intricate hair details is an important step to achieving seamless and professional results. Among the tools available on the market to help you remove the background, we suggest you try Photoshop. Usually, other tools will help you remove the background quickly and simply, but there will be no feature for you to easily remove the background with hair. Several features in Photoshop can help with this, each catering to different levels of complexity and user preferences. Here’s how to choose the right feature for your specific image editing needs so you can easily remove background with hair:
- Pen Tool: Accuracy at your fingertips
The Pen tool is the right choice when accuracy is paramount. It allows you to manually create anchor points and curves, resulting in meticulously precise selections. Choose the Pen Tool when working with images with complex hair textures and small details.
- Quick Selectors: Swift and Simplify
For images with relatively different subjects and simpler hairstyles, the Quick Selection Tool can prove to be effective. It automatically detects edges and selections, making it a great choice when dealing with subjects with well-defined hair on distinct backgrounds.
- Edge Refining/Select and Mask: Fine Hair Refining
After making a basic selection, the Refine Edge or Select and Mask tool becomes invaluable. These tools allow you to smooth rough edges, adjust hair selections, and manage finer details. Use them to refine your initial selection subtly for more realistic results.
As hair is a difficult task to remove the background perfectly, that’s the reason why you should learn a few tips to use Photoshop to edit the background. But in case you want to remove the background simply, which means you don’t have to carefully remove every detail of the hair, you can use Canva to help you. It is a familiar tool for many editors, so you can use Canva for background removal.
How to remove background with hair in Photoshop
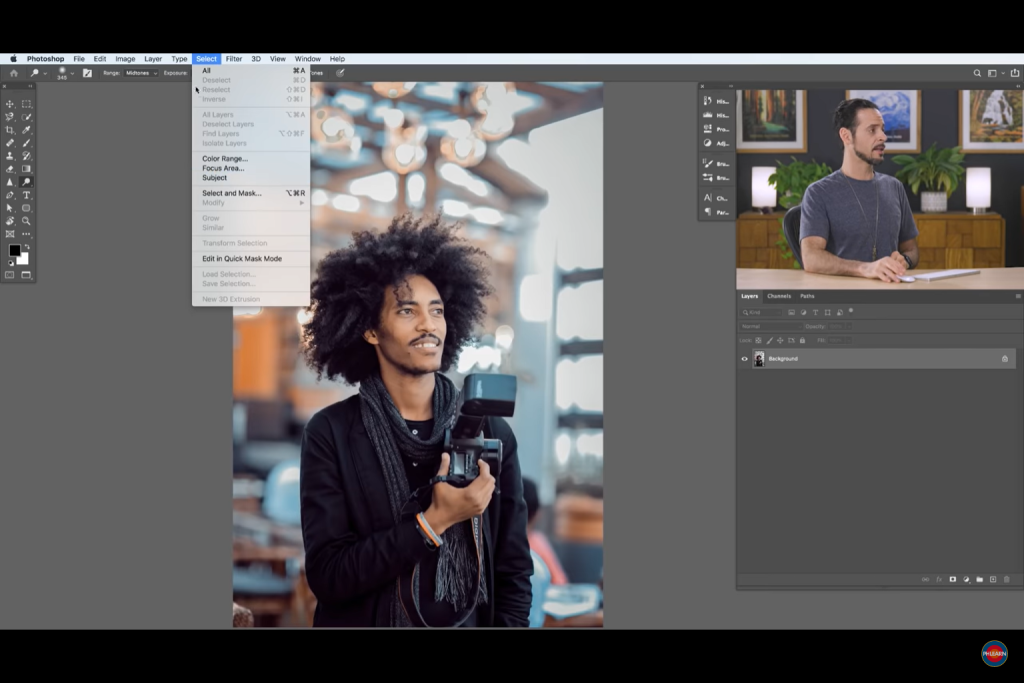
- Choose to the “Select” option located in the top menu and select “Subject.” To modify your selection, employ the “Add to Selection” or “Subtract from Selection” choices found in the upper-left menu.
 Remove background with hair in Photoshop
- Proceed to the “Layers” menu situated within the right-hand toolbar, then click on the icon resembling an “Add Layer Mask” (a rectangle containing a circle at its center).
 Add Layer Mask function
- The next step will involve refining the edges. Head to the “Select” menu positioned at the top toolbar and choose “Select and Mask.”
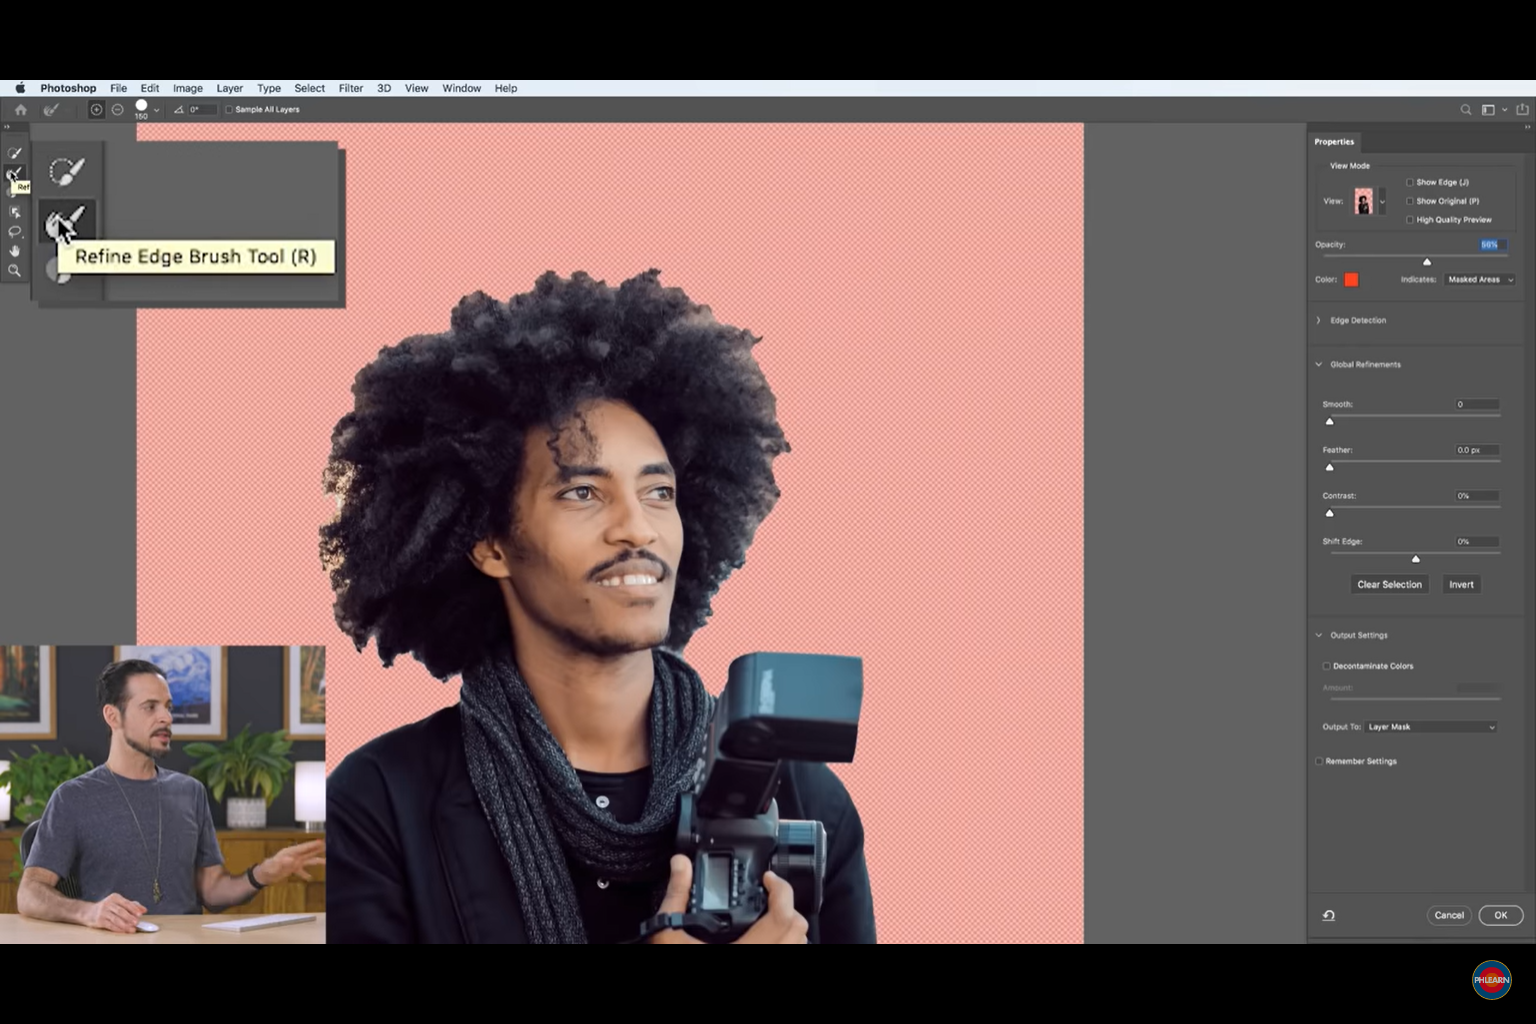
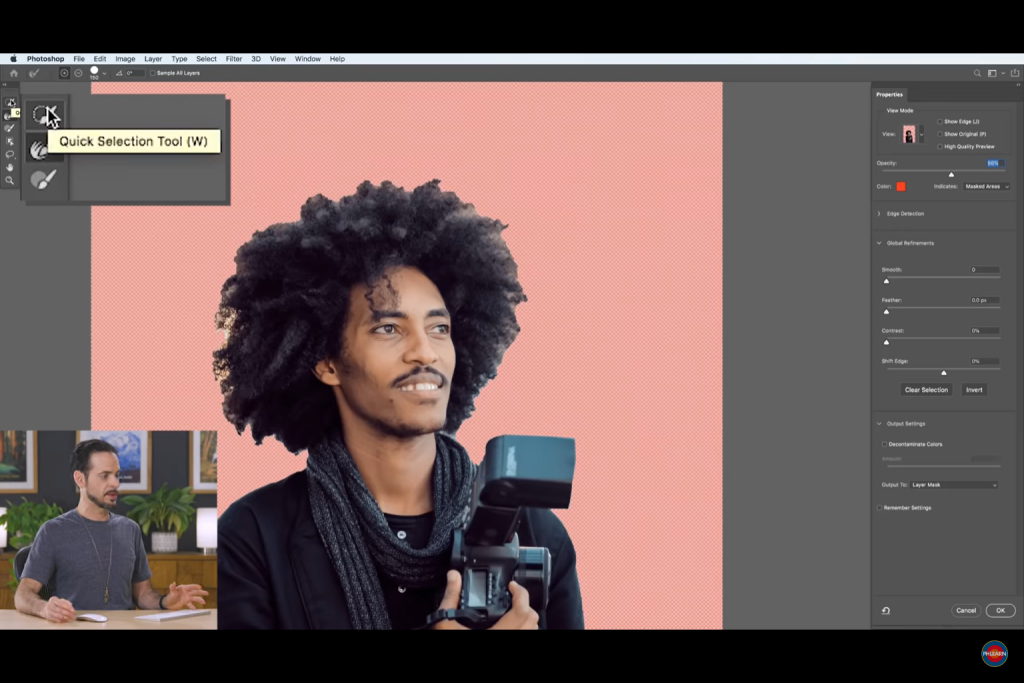
- Within the left-hand toolbar, locate and choose the “Refine Edge Brush Tool,” nested within the “Quick Selection Tool.”
 Quick Selection Tool
- Using the “Refine Edge Brush Tool,” carefully paint along the edges of the hair to achieve a smoother appearance.
 Refine Edge Brush Tool
- After completing this step, access the “Properties” menu located in the right-hand toolbar. Locate the “Output To Settings” and opt for “Layers Mask” from the dropdown menu. Confirm your selection by clicking “OK.” Should the edges still lack desired smoothness, press and hold “Alt” (Windows) or “Option” (Mac) on your keyboard, and simultaneously click the layer mask thumbnail to reveal the layer mask.
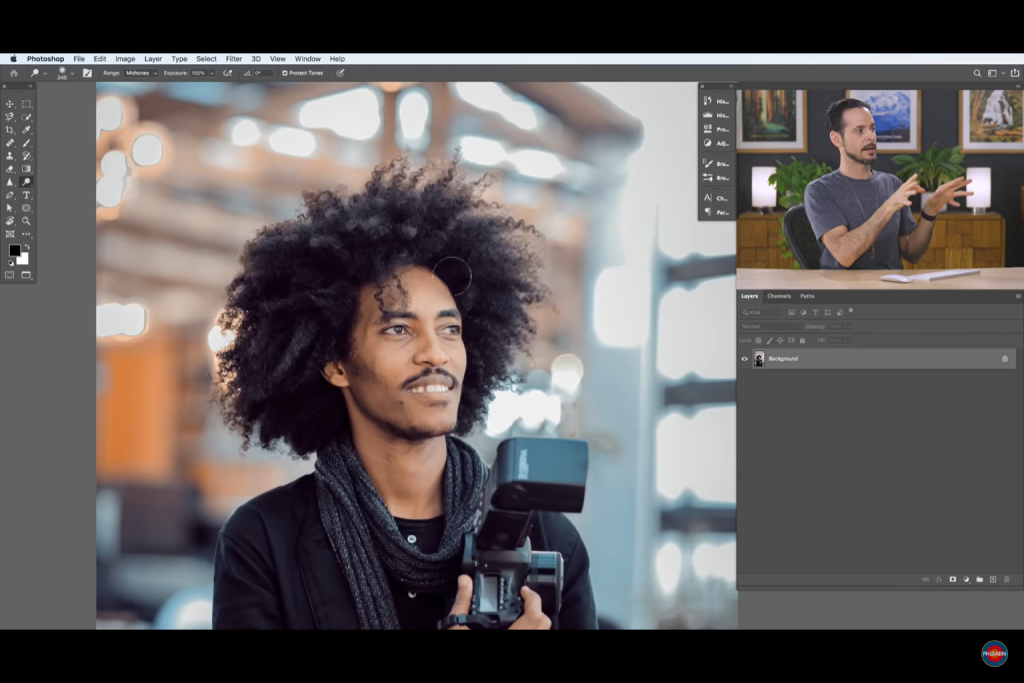
- To activate the Brush Tool, press the “B” key on your keyboard. Access the “Mode” settings from the top menu and select “Overlay” from the provided dropdown menu. Employ the brush to paint over the areas of the hair edges that require further clarity.
- For another view of your image, once again hold down “Alt” (Windows) or “Option” (Mac), and click on the layer mask thumbnail.
Conclusion
Removing a background while preserving detailed hair details is a talent that takes time and expertise. You may get remarkable results that take your photographs to a professional level by using the correct techniques and equipment. Experiment, hone your talents, and enjoy the creative possibilities that Photoshop provides. So go ahead and make some eye-catching graphics!


